In this case, much like with Accounts, there aren’t too many mysteries. Contacts are simply records, most often associated with Accounts, meaning employees of a particular company or individuals with whom you establish cooperation during sales activities, such as writing to them or calling them if you are a salesperson. Contacts appear in Salesforce after converting Leads or can be created directly on Accounts by clicking the New button in the Account Related List.
The Contact object includes fields such as first and last name, email address, one or more phone numbers, and address details. These details may differ from the registration data of the associated Account, as the contact person might work in a different department or city. You can record activities related to the Contact, such as calls or meetings. Additionally, you can add notes about important matters.
An important Salesforce functionality related to Contacts is the ability to connect one Contact to multiple Accounts. Sometimes, one person may be associated with several companies simultaneously, and we’d like to note such a fact. This could be a recruiter recruiting for several subsidiaries of the same parent company or a chief financial officer overseeing multiple companies.
Salesforce allows us to mark such dependencies, utilizing an intermediary object that enables us to link one Contact with one, two, or multiple Accounts. Before this feature was available (and I remember those times!), either Salesforce users had to create duplicate Contacts and link them to different Accounts, leading to unnecessary records in the database, or custom solutions were developed at the request of clients. Fortunately, at some point, Salesforce recognized this issue and created the necessary functionality that meets the most important requirements of users in this dimension. Let’s see together how to connect a Contact to more than one Account. The following is a description of how to enable this functionality in Salesforce. There is also a chance that you have it enabled by default.
In that case, skip steps 1-3 and follow along only with the process of linking a Contact to different Accounts:
- From Setup, enter Account Settings in the quick find box, and then select Account Settings.
- Select Allow users to relate a contact to multiple accounts and click Save.
- Add the Related Contacts Related List to the Account user interface.
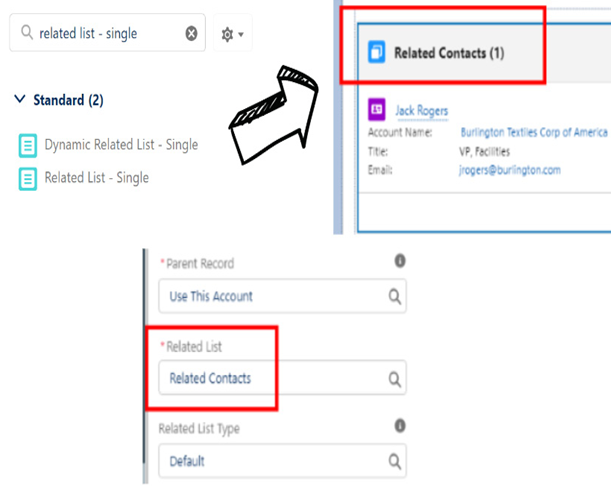
Figure 11.7: Related Contacts
- Look for a Contact and click the Add Relationship button.
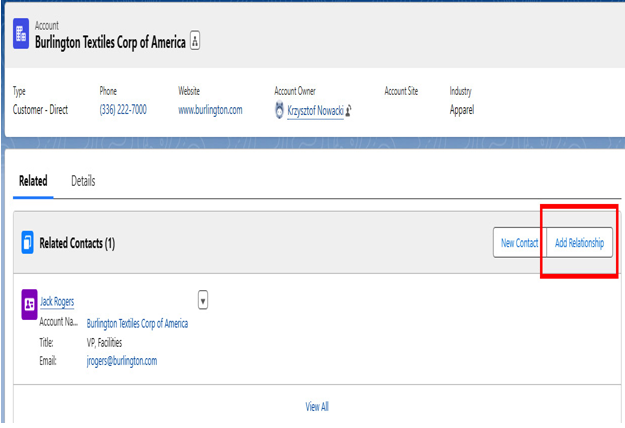
Figure 11.8: Related Contacts new relationship
- Set up the new relationship and save your changes – you may use the Contact that is already on the Account but link it with another Account. In the following example, the Jack Rogers Contact is already linked with the Burlington Textiles Corp of America Account, but I have also linked it with another Account, Piramid Construction Inc.
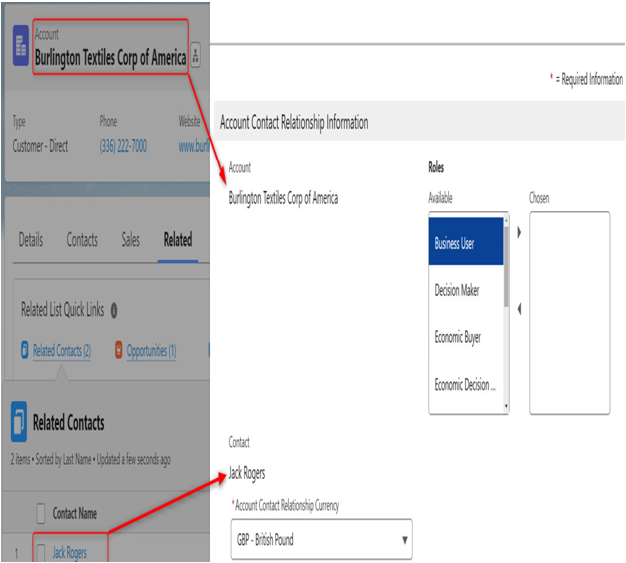
Figure 11.9: Related Contacts new relationship setup
Congratulations! You have just learned how to relate one Contact to multiple Accounts. You may spread this knowledge further. Believe me, your users will be more than happy knowing this is possible in Salesforce.